• Our new ticketing site is now live! Using either this or the original site (both powered by TrainSplit) helps support the running of the forum with every ticket purchase! Find out more and ask any questions/give us feedback in this thread!

DIY House rendering drip bead question

Status
Not open for further replies.

hi2u_uk

Member
Joined
26 Apr 2014
Messages
252
I know this is probably the wrong website for this but i thought i would try anyway :D

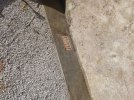
Can anyone tell from this picture whether a drip bead has been installed under the damp proof course?

Is the next step to apply another coat of rendering and then paint over it ?


If so what sort of Paint would be best and what sort of timescale to do this before damage occurs as its been like this for near 6months now
Many Thanks:D
 

Attachments

  • 20220415_140242smaller.jpg
    20220415_140242smaller.jpg
    100.6 KB · Views: 16
  • Document2.pdf
    519.1 KB · Views: 8
Sponsor Post - registered members do not see these adverts; click here to register, or click here to log in
R

RailUK Forums

Cowley

Forum Staff
Staff Member
Global Moderator
Joined
15 Apr 2016
Messages
18,896
Location
Devon
I know this is probably the wrong website for this but i thought i would try anyway :D

Can anyone tell from this picture whether a drip bead has been installed under the damp proof course?

Is the next step to apply another coat of rendering and then paint over it ?


If so what sort of Paint would be best and what sort of timescale to do this before damage occurs as its been like this for near 6months now
Many Thanks:D

I can’t see anything on there? But then I’m only looking at it on my small phone screen.
Is it just standard sand/cement render? Maybe if you could take a photo from underneath the edge and also a photo from further away so it’s possible to see the whole job that’d be quite useful @hi2u_uk. :)
 
Last edited:

Snow1964

Established Member
Joined
7 Oct 2019
Messages
11,074
Location
West Wiltshire
It’s not possible to see the damp proof course in the photos

There is a galvanised metal strip which is the drip bead, but these are supposed to drip clear of the lower brickwork. I have seen the lower section rendered before (usually where it was built with non faced engineering bricks) but it doesn’t look like the top has a slope to take water away (but can’t see clearly from the photo angle)

What I find odd is the render is normally flared out at the bottom so that drips are clear of the lower wall below the damp course.

You certainly don’t want to be building the lower render out any further without a distinct gap where the damp course line is (it looks like the 2 renders run into each other in places which is wrong), But it might just be the photo makes it look like this
 

hi2u_uk

Member
Joined
26 Apr 2014
Messages
252
1651333271378.png1651333336930.png:?:1651333522322.png
1651333271378.png1651333336930.png1651333522322.png


1651333271378.png1651333336930.png

Thanks for the reply. Im not there at the moment so all i can do is to send the pictures i was sent and enlarge them. The issue is that i thought that the drip beading would be more visible in the pictures , but from the pictures it looks like it hasnt actually been fitted unless it wouldnt be visible to the eye


1651333522322.png:?::?::?:

== Doublepost prevention - post automatically merged: ==

It’s not possible to see the damp proof course in the photos

There is a galvanised metal strip which is the drip bead, but these are supposed to drip clear of the lower brickwork. I have seen the lower section rendered before (usually where it was built with non faced engineering bricks) but it doesn’t look like the top has a slope to take water away (but can’t see clearly from the photo angle)

What I find odd is the render is normally flared out at the bottom so that drips are clear of the lower wall below the damp course.

You certainly don’t want to be building the lower render out any further without a distinct gap where the damp course line is (it looks like the 2 renders run into each other in places which is wrong), But it might just be the photo makes it look like this
Thanks i actually thought that the damp course was where the holes in the pictures are
i also thought the drip bead would obviously stick out which is why i was wondering if there was one there but im not 100% sure what a correctly fitted drip bead should look like . If the drip bead is already there then i guess theres nothing more than can be done to make it stick out more ??
Im not sure where you think the two renders are running into each other though :(
 
Last edited:
Status
Not open for further replies.

Top